
Hey World,
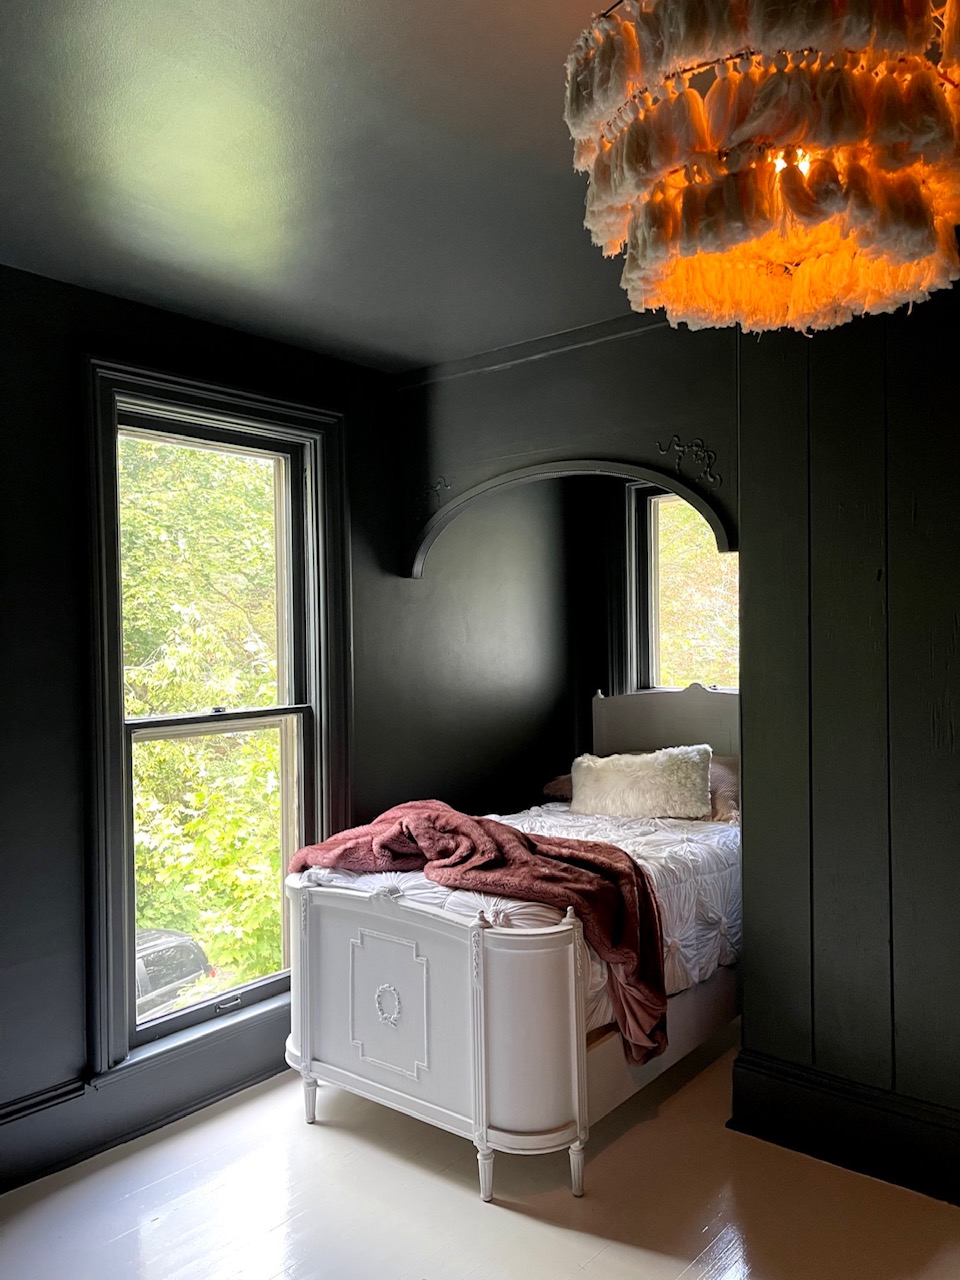
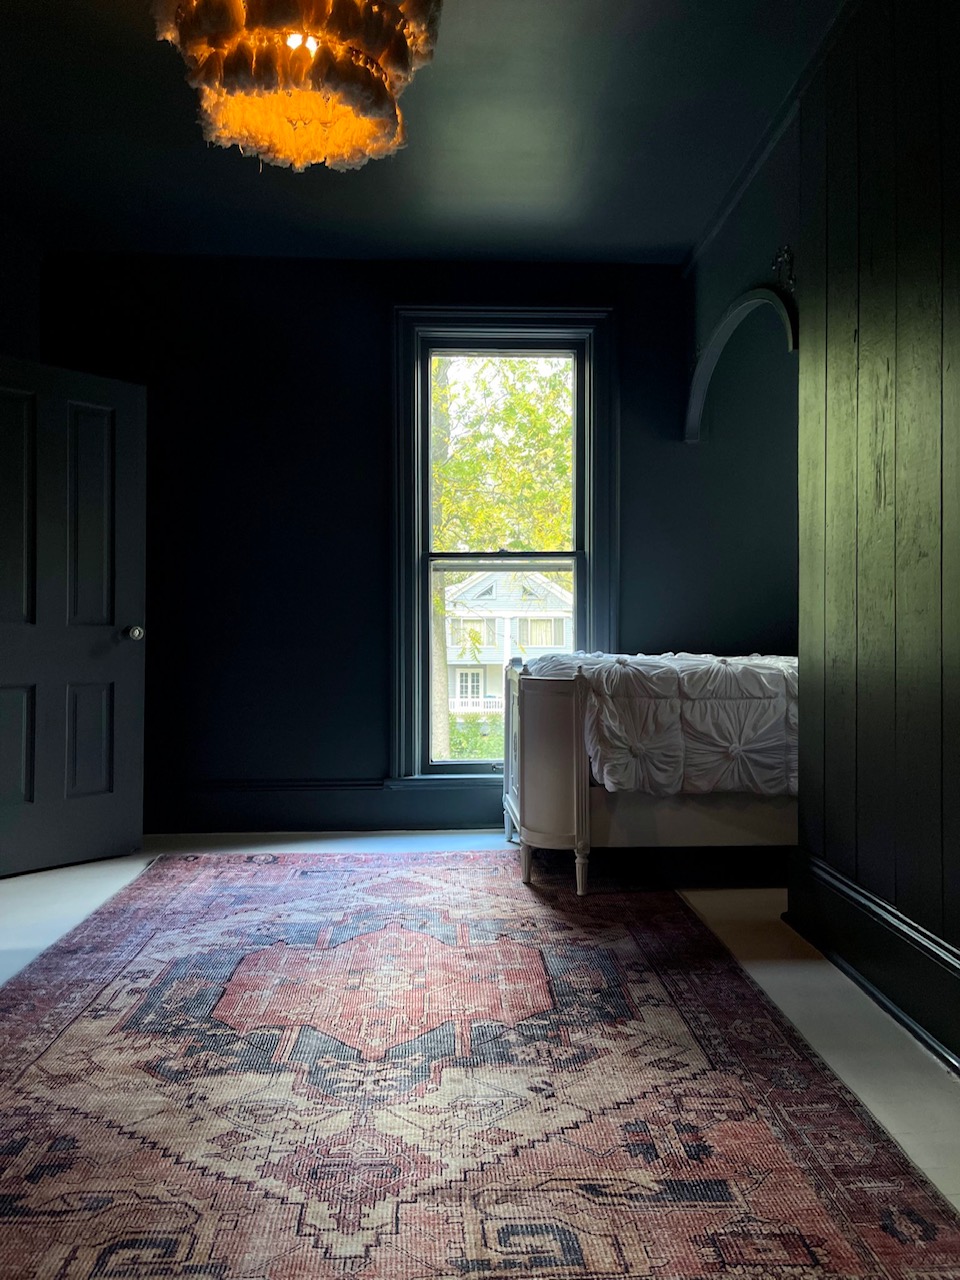
Rob here to tell you about the steps I took to paint the girls’ rooms’ floors. To get going, I’ll start with the straightforward one, my youngest’s room. Her little unique space has moody walls (farrow and ball down pipe) that Susan picked out a light, white(ish) color that we painted her whole floor with (pointing by farrow and ball) For this season of her life, she has been kind of obsessed with outer space, so she wanted a star filled room. Susan recently bought a nightlight that displays “stars” and “galaxies” on the ceiling (Here’s the link if your kiddo likes stars in their room too 🙂 ) and when combined with the dark walls it looks awesome, not going to lie.
The tricks to painting floors are straight forward but may not be completely obvious.
First, outline the parameter with a brush but make sure to follow the grain pattern in the wood. So typically, this means that two walls will be easy since the grain will follow along the wall and the other two walls will be tedious as you must apply paint only the same width of the brush. But if you don’t do this you’ll see the irregular pattern of the bristle crosscut against the grain of the wood. Annoyingly you won’t really see it until the paint is dry and to fix you must sand it down.
Second, you’ll want to always use paint specifically made for floors. Initially I questioned this since I knew I was going to apply poly over it as protection against normal traffic but when I asked the Home Depot guy he said the paint is mixed to 1) be more resilient against scuffs than typical wall paint, and 2) better accept the poly coating. Now, the guy may be lying is butt off, but he said it very confidently and with great emphasis on how important it was to use floor paint over wall paint, so I’m going with it.
Third, always apply poly and let it dry overnight. This step is the most frustrating for me. Inevitably I will always miss a drip or worse, leave a large glob that must be fixed (will detail how to fix below). But these issues are worth the hassle because poly protects against scuffs and spills. Plus, it gives the floor a finish that doesn’t stand out per se but is absolutely noticeable if absent. The shine of the poly and the slight patina look is definitely something that should be part of the process.
If you find that you’ve missed a drip or glob there are one of two options to fix. First, if it’s small and/or not in a place your wife will notice, simply paint over it and pretend it never happened. Hopefully the spot is small enough where a topcoat of poly over the repaint isn’t needed, but if not, apply a thin layer with a brush after your touchup. The second option is what I had to do because my mistakes, as is always the case, were large and immediately noticeable by everyone.
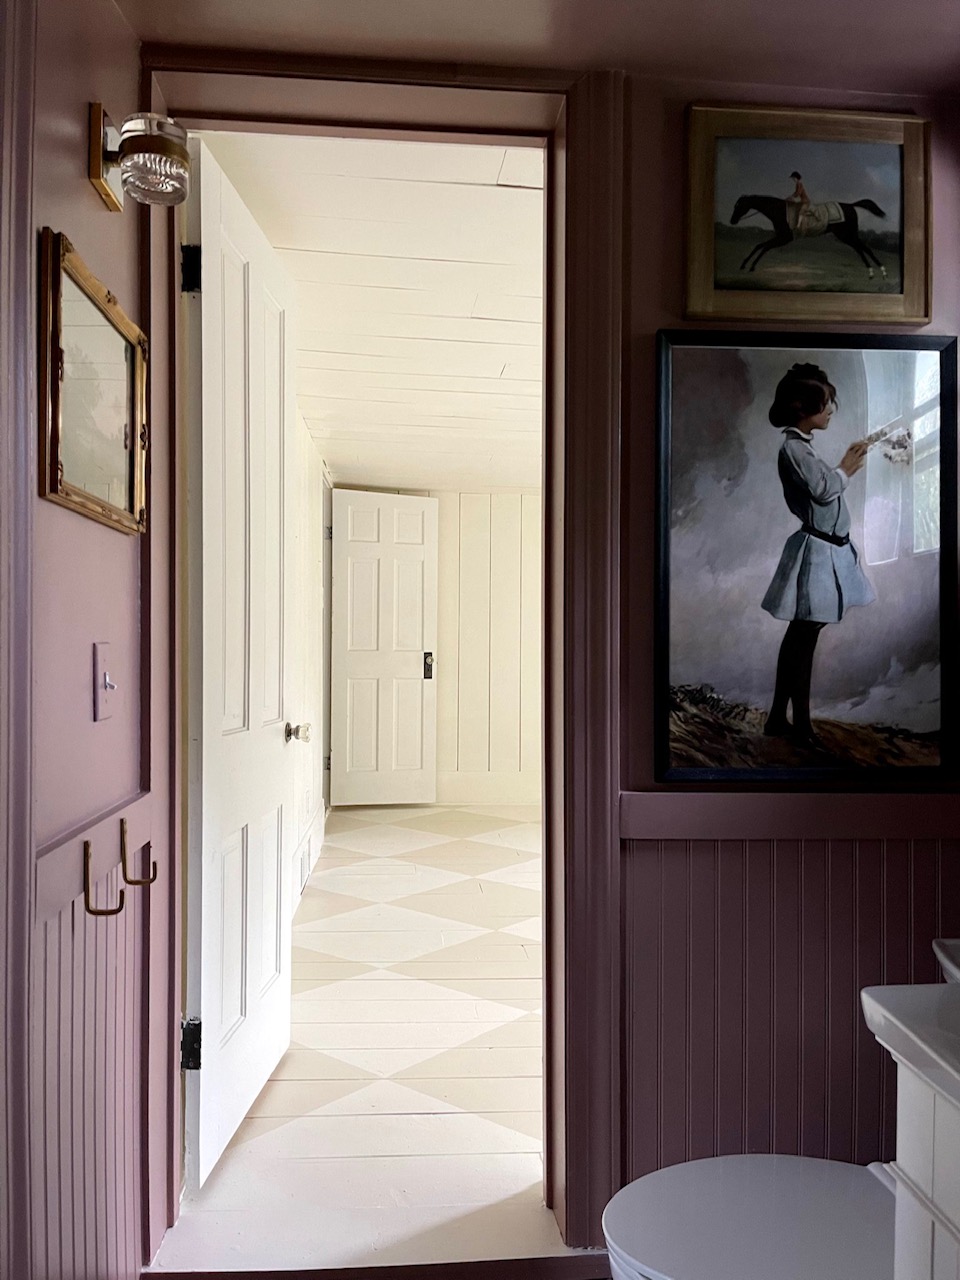
The mistake glob I left to dry overnight was right in front of the bathroom door. No way to hide it with paint. To fix, required scraping and sanding. Initially I used 60 grit sandpaper in the hope that the glob of poly would smooth off like wood does. Unfortunately, it ended up tearing and balling up into little plastic looking pellets. I mean, this kind of makes sense since plastic and poly are both oil products. After a few failures, I tried a higher grit sandpaper and had better results. The 150-grit sandpaper worked the best and I sanded the blob all the way down to the bare wood. I then repainted, and re-poli-ed the area, making sure to overlap onto the non-messed up section so that it blended in well.

This good boy didn’t find the globs too bad
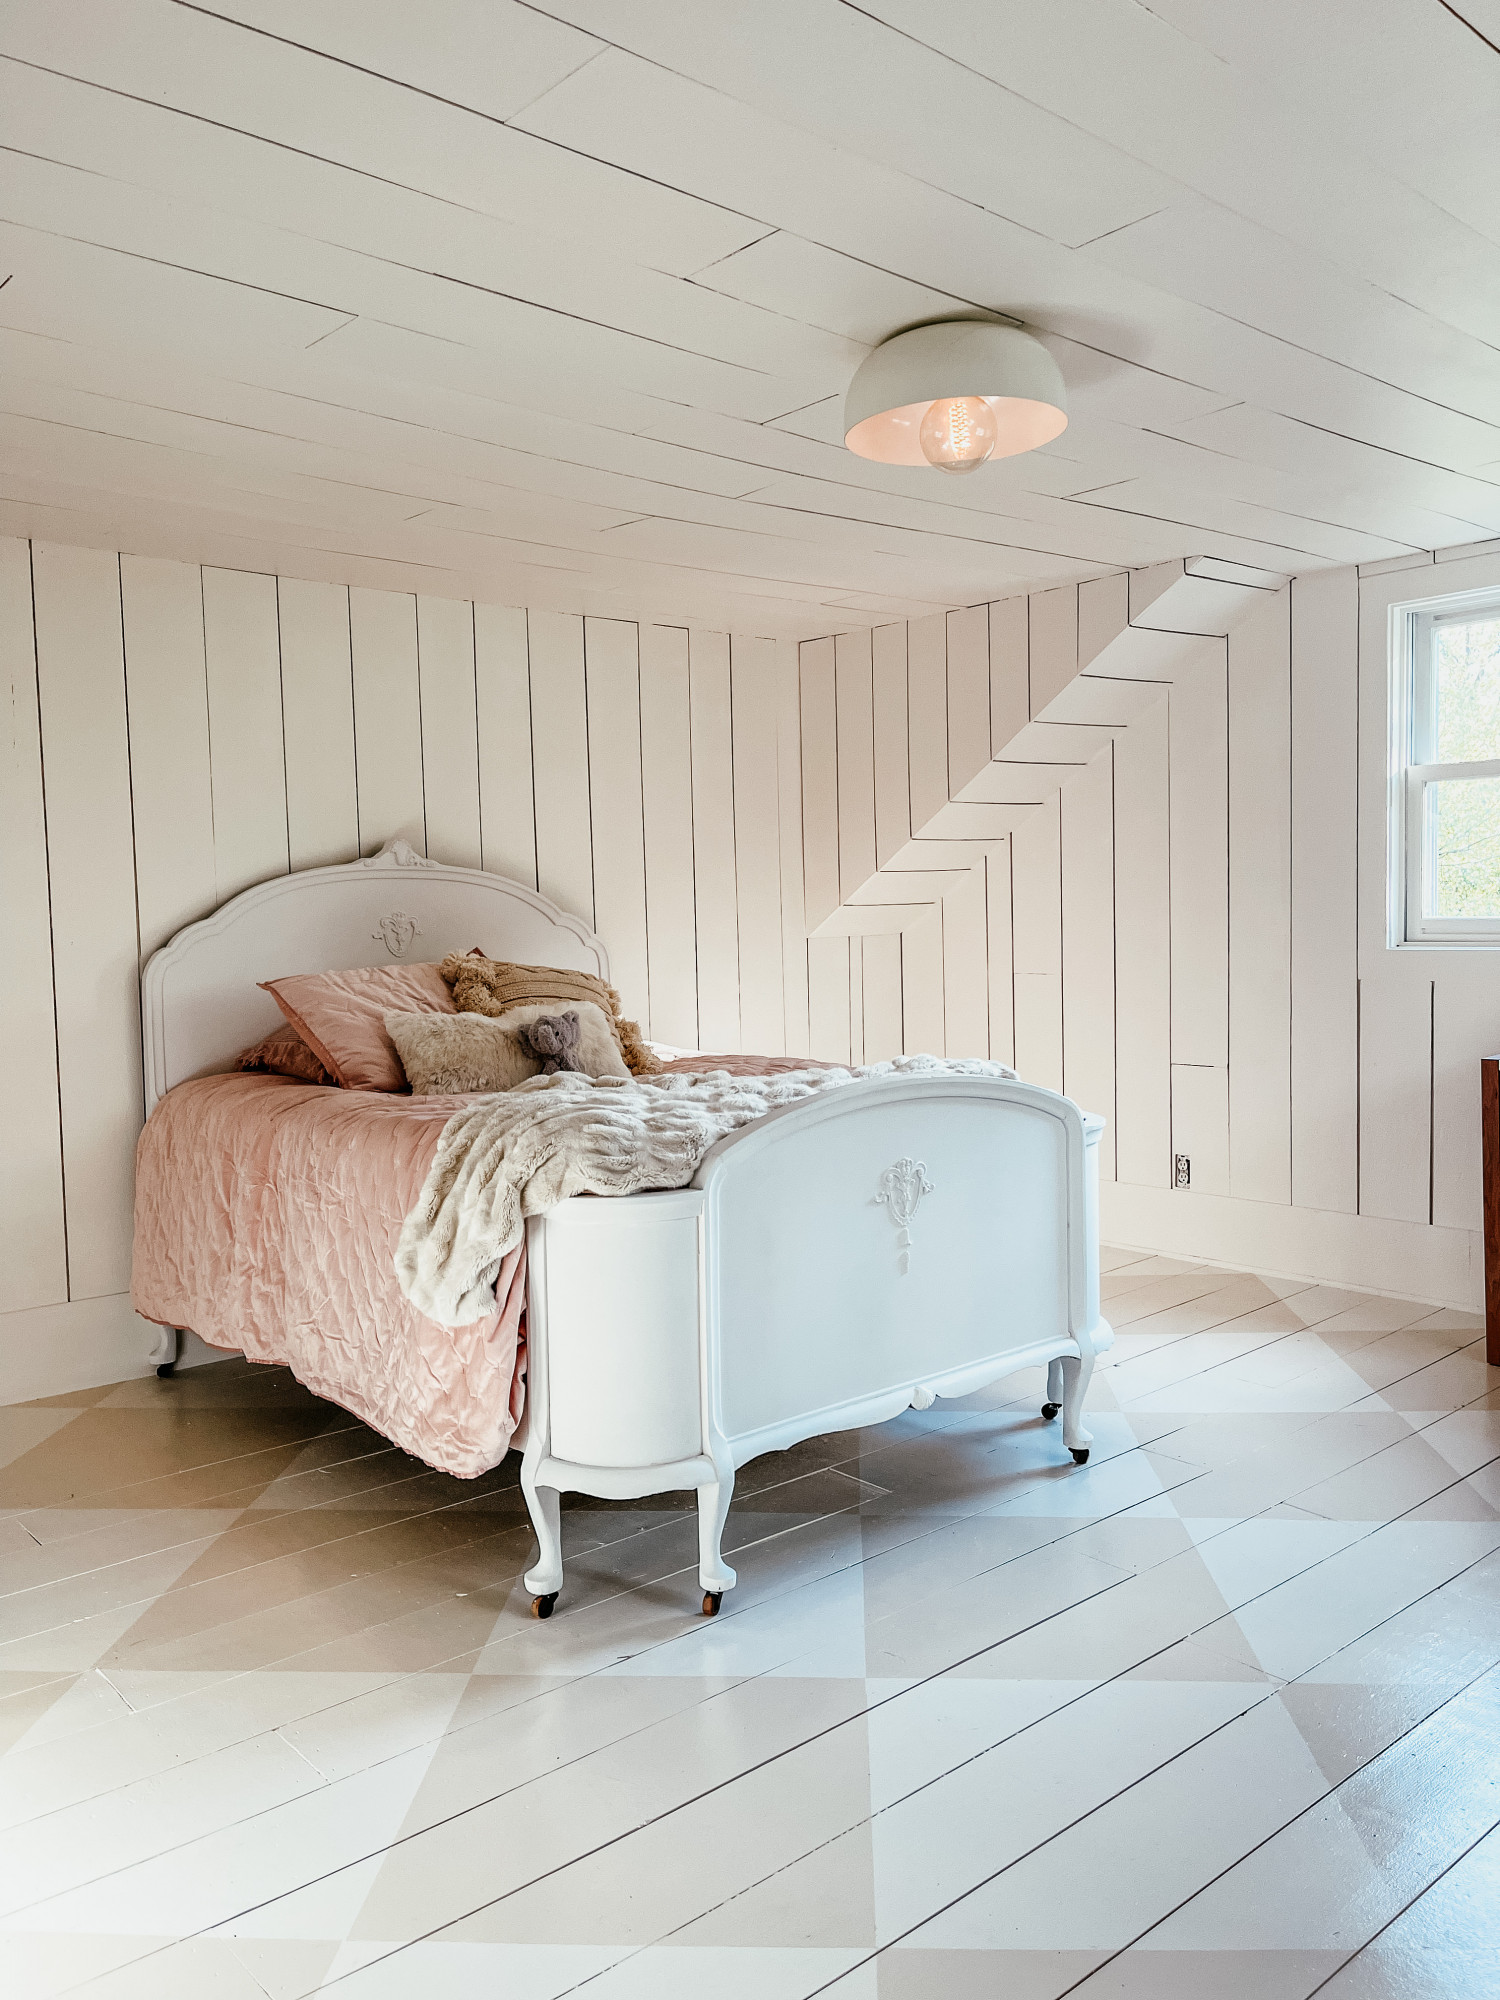
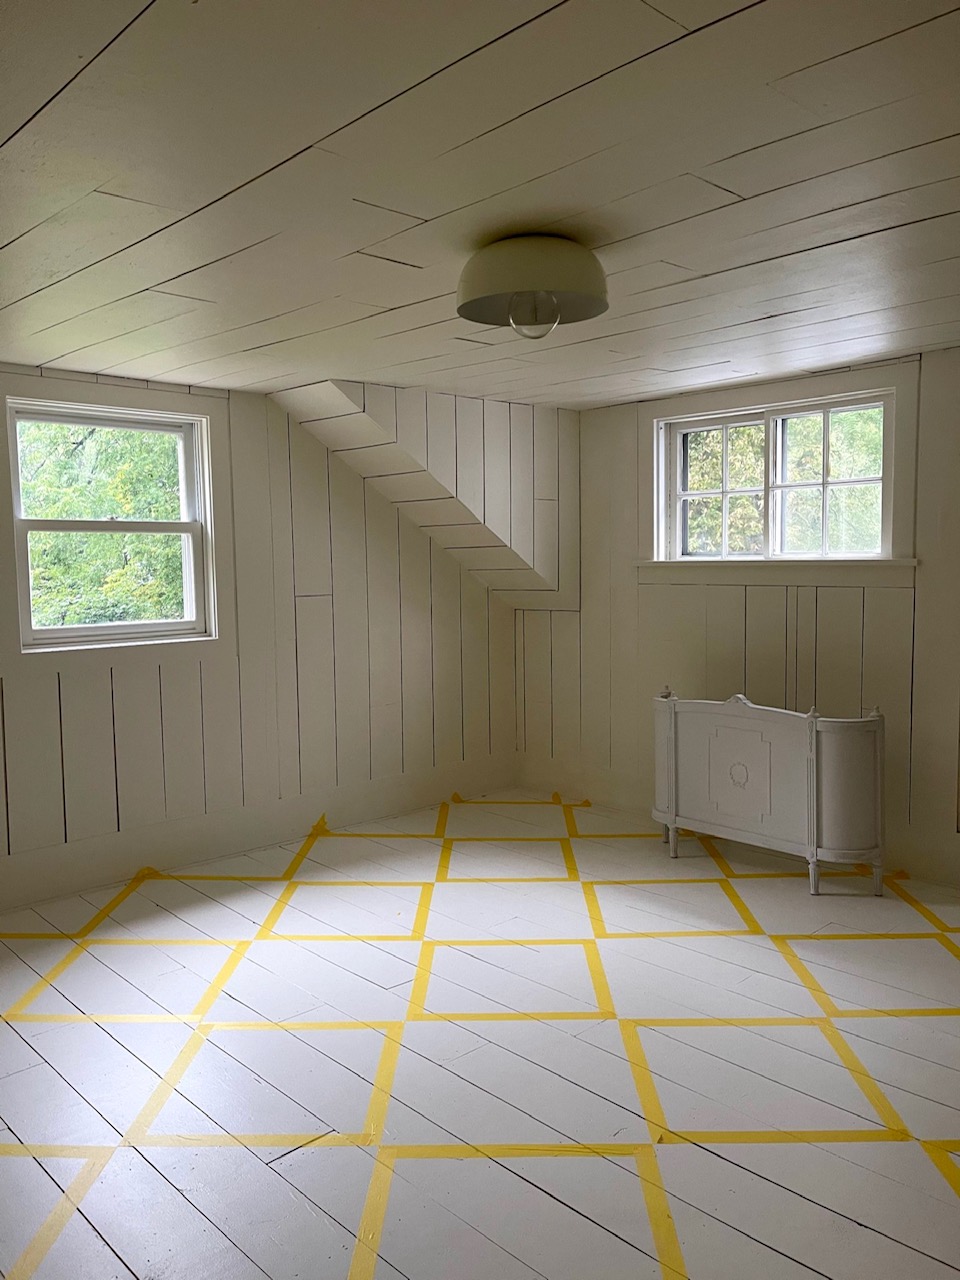
The diamond pattern required all the steps needed in the first room plus a whole lot of tedious taping. Our oldest daughter wanted something special and unique in her room as well but something that wouldn’t compete with the shiplap. When Susan showed her the harlequin floor pattern it was love at first site so we got to work!
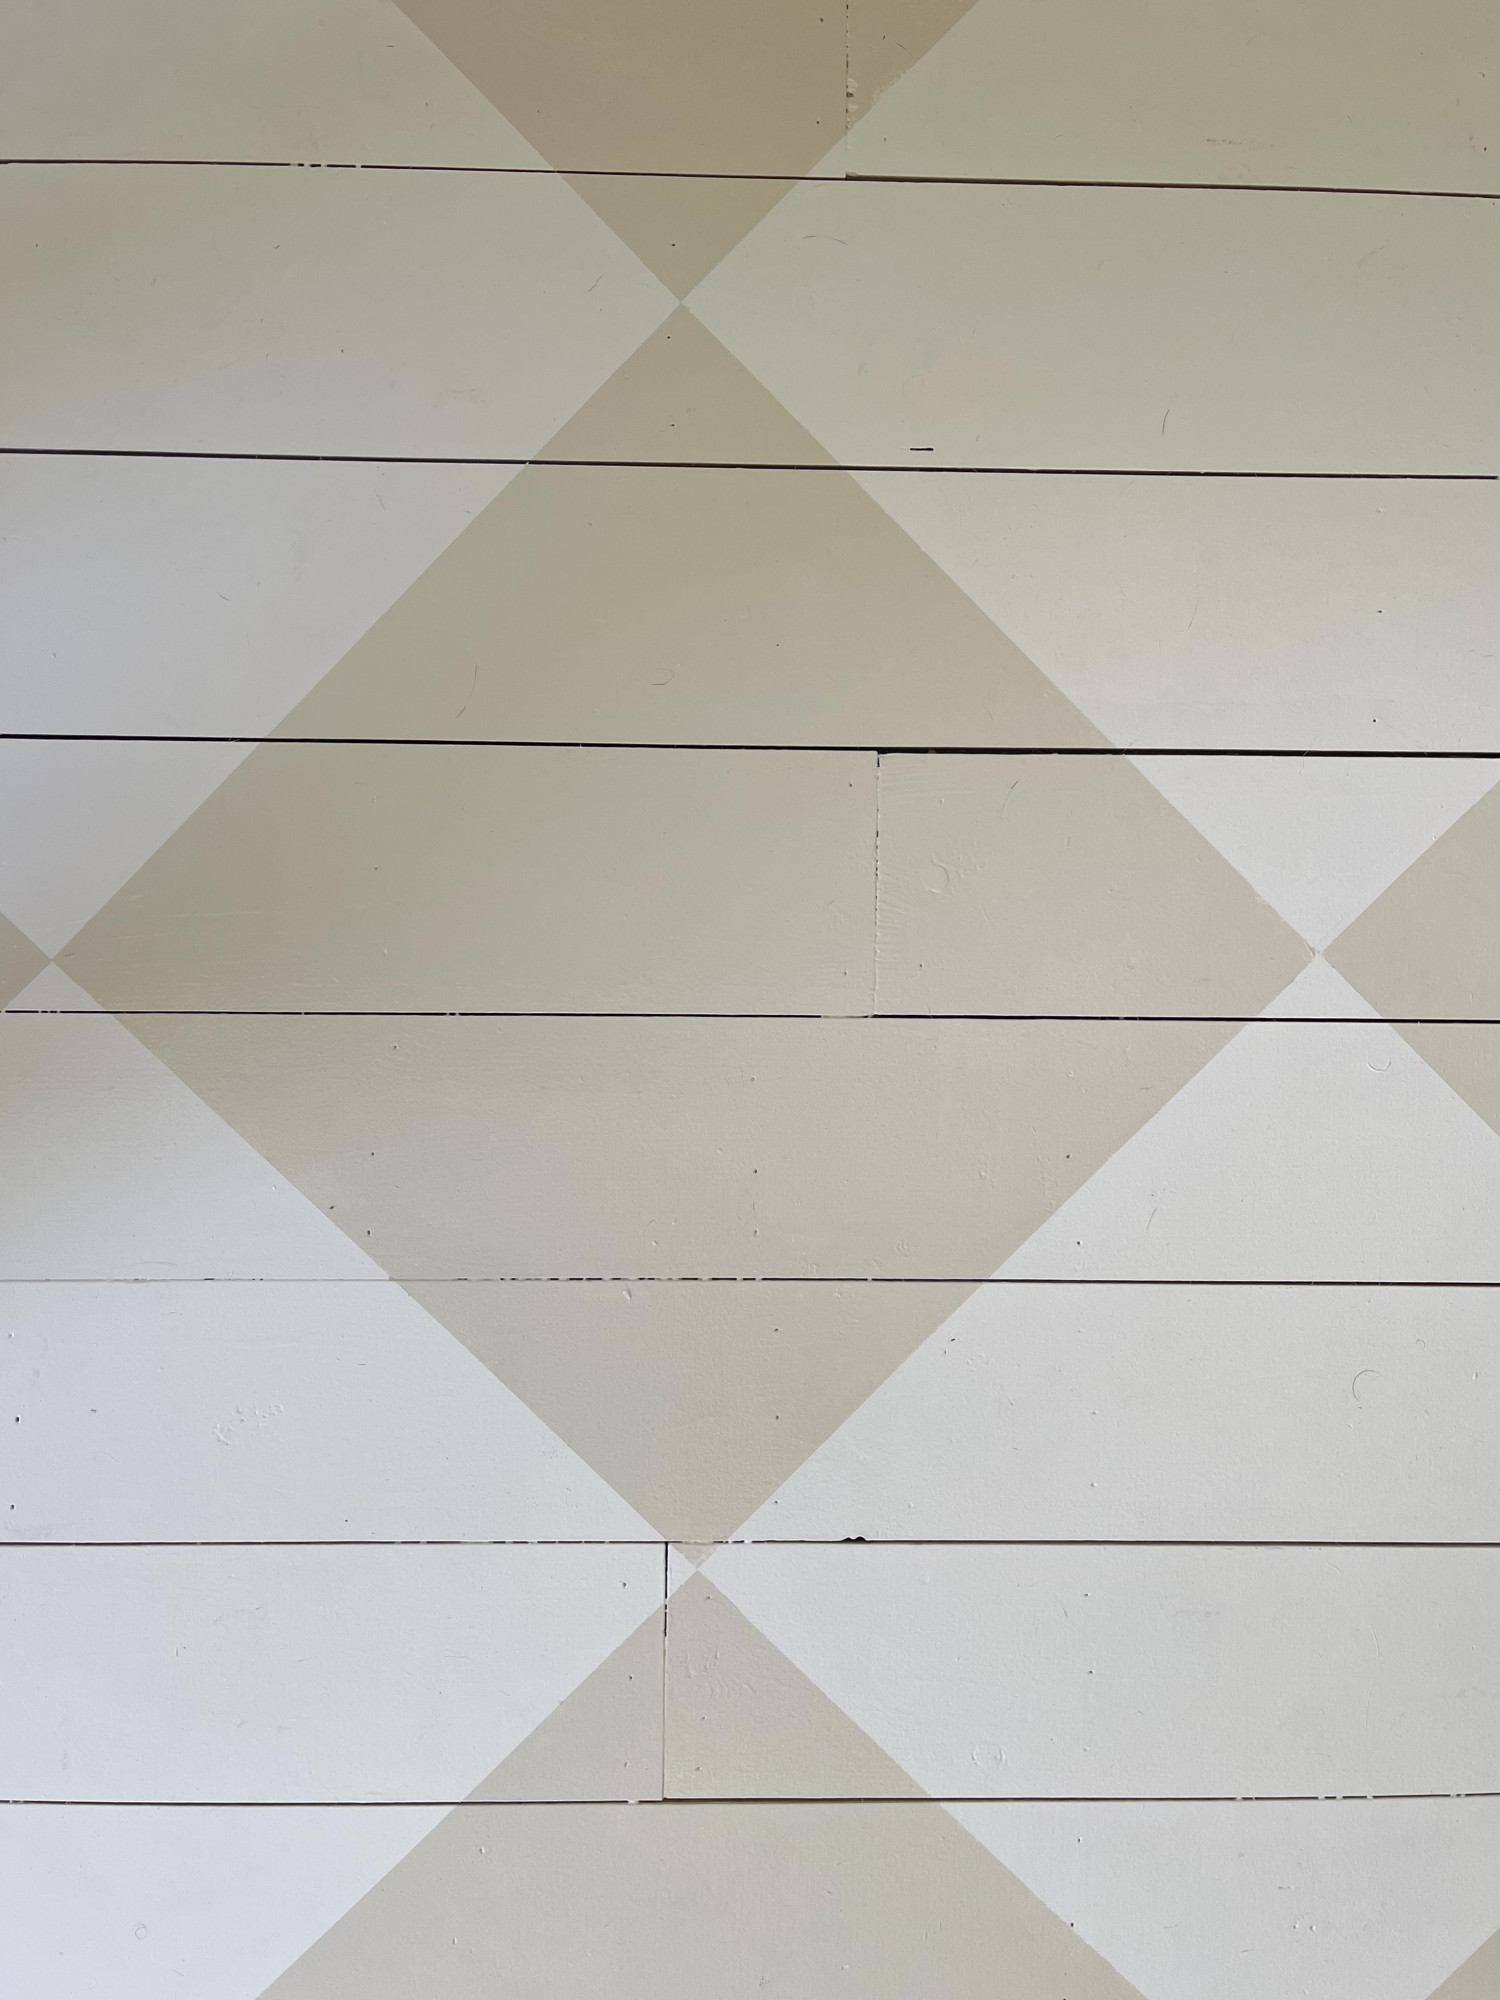
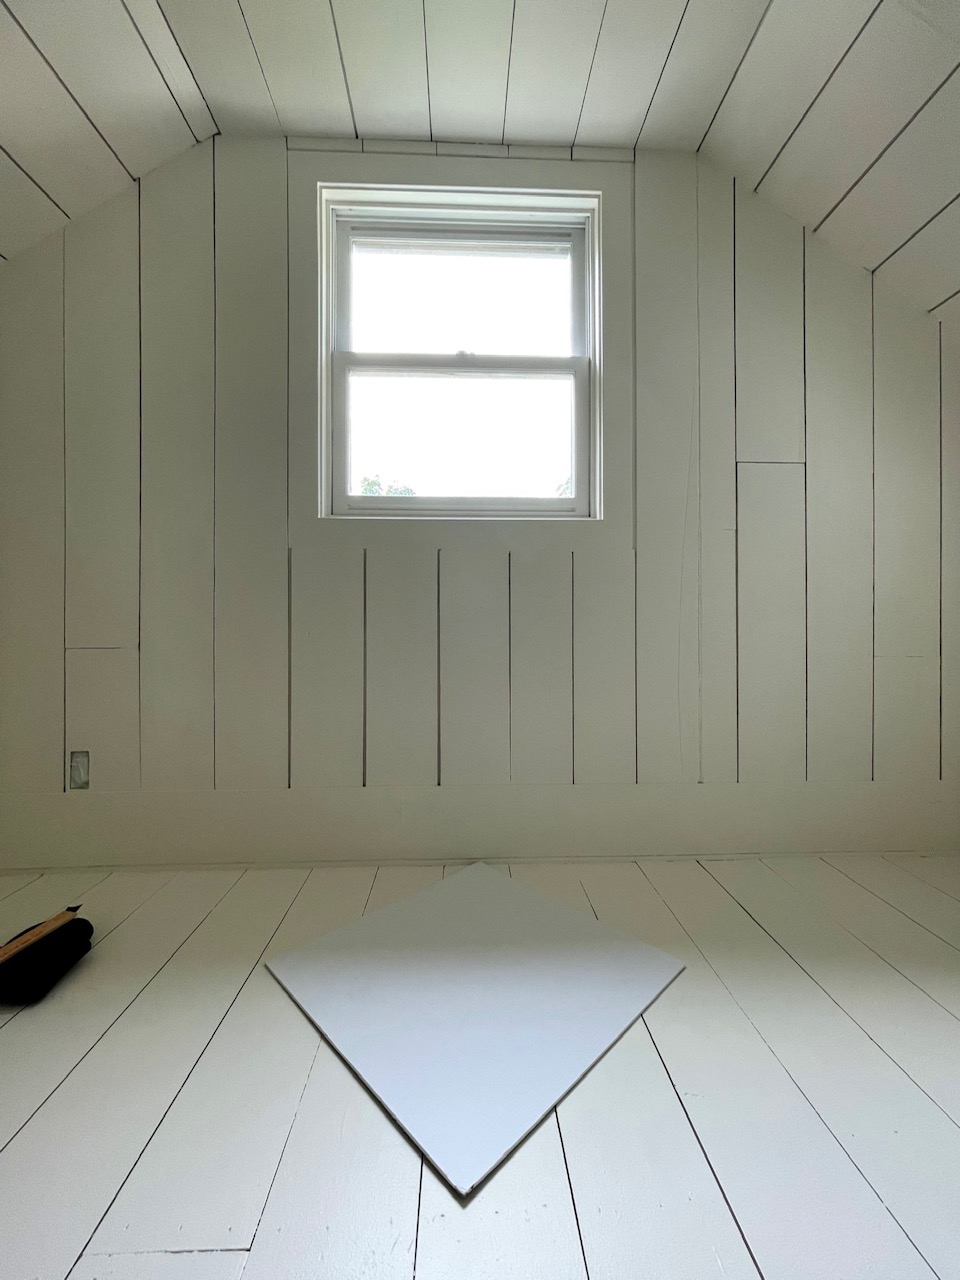
To begin we found the center of the back wall by measuring the entire width and dividing by two. We knew the eye is drawn to that point, so building out the diamond pattern from there looked the best. Next, we cut out a template to help guide the taping. Susan picked up a 24”X36” poster board from the dollar store. I then cut it down to a 24”X24” square with a razor. A little trick we used was to tape the sides of the board to add rigidity and smooth the edges.
Once we had our starting point and diamond we were ready to begin. With our house being as old as it is, I knew that nothing would be truly straight. To address this issue, I used a laser level that my mom bought me for Christmas 2020 (thanks mom!!!) to ensure the diamond template was placed correctly. That means that the top point of the square was at the center of the room and the bottom aligned with the laser guide. And because the template is simply a square laid diagonally so that it magically became a diamond, I know that each side was even. Thus, the north/south and east/west orientation was set up correctly.
If you don’t have a laser level that can measure N/S and E/W then you can use a carpenter’s square or really any long board that you know has edges that are 90 degrees. And honestly, even with the laser guide the squares I taped off are not all perfectly the same size. There is some give that you have with this since the errors get overlooked by the human eye. So long as the points where the diamonds meet are together and the squares are reasonably alike, then you’re good. Even Susan, whose job it is to find flaws and make them pretty, didn’t notice the places where I had to adjust the tape so that the points met up.
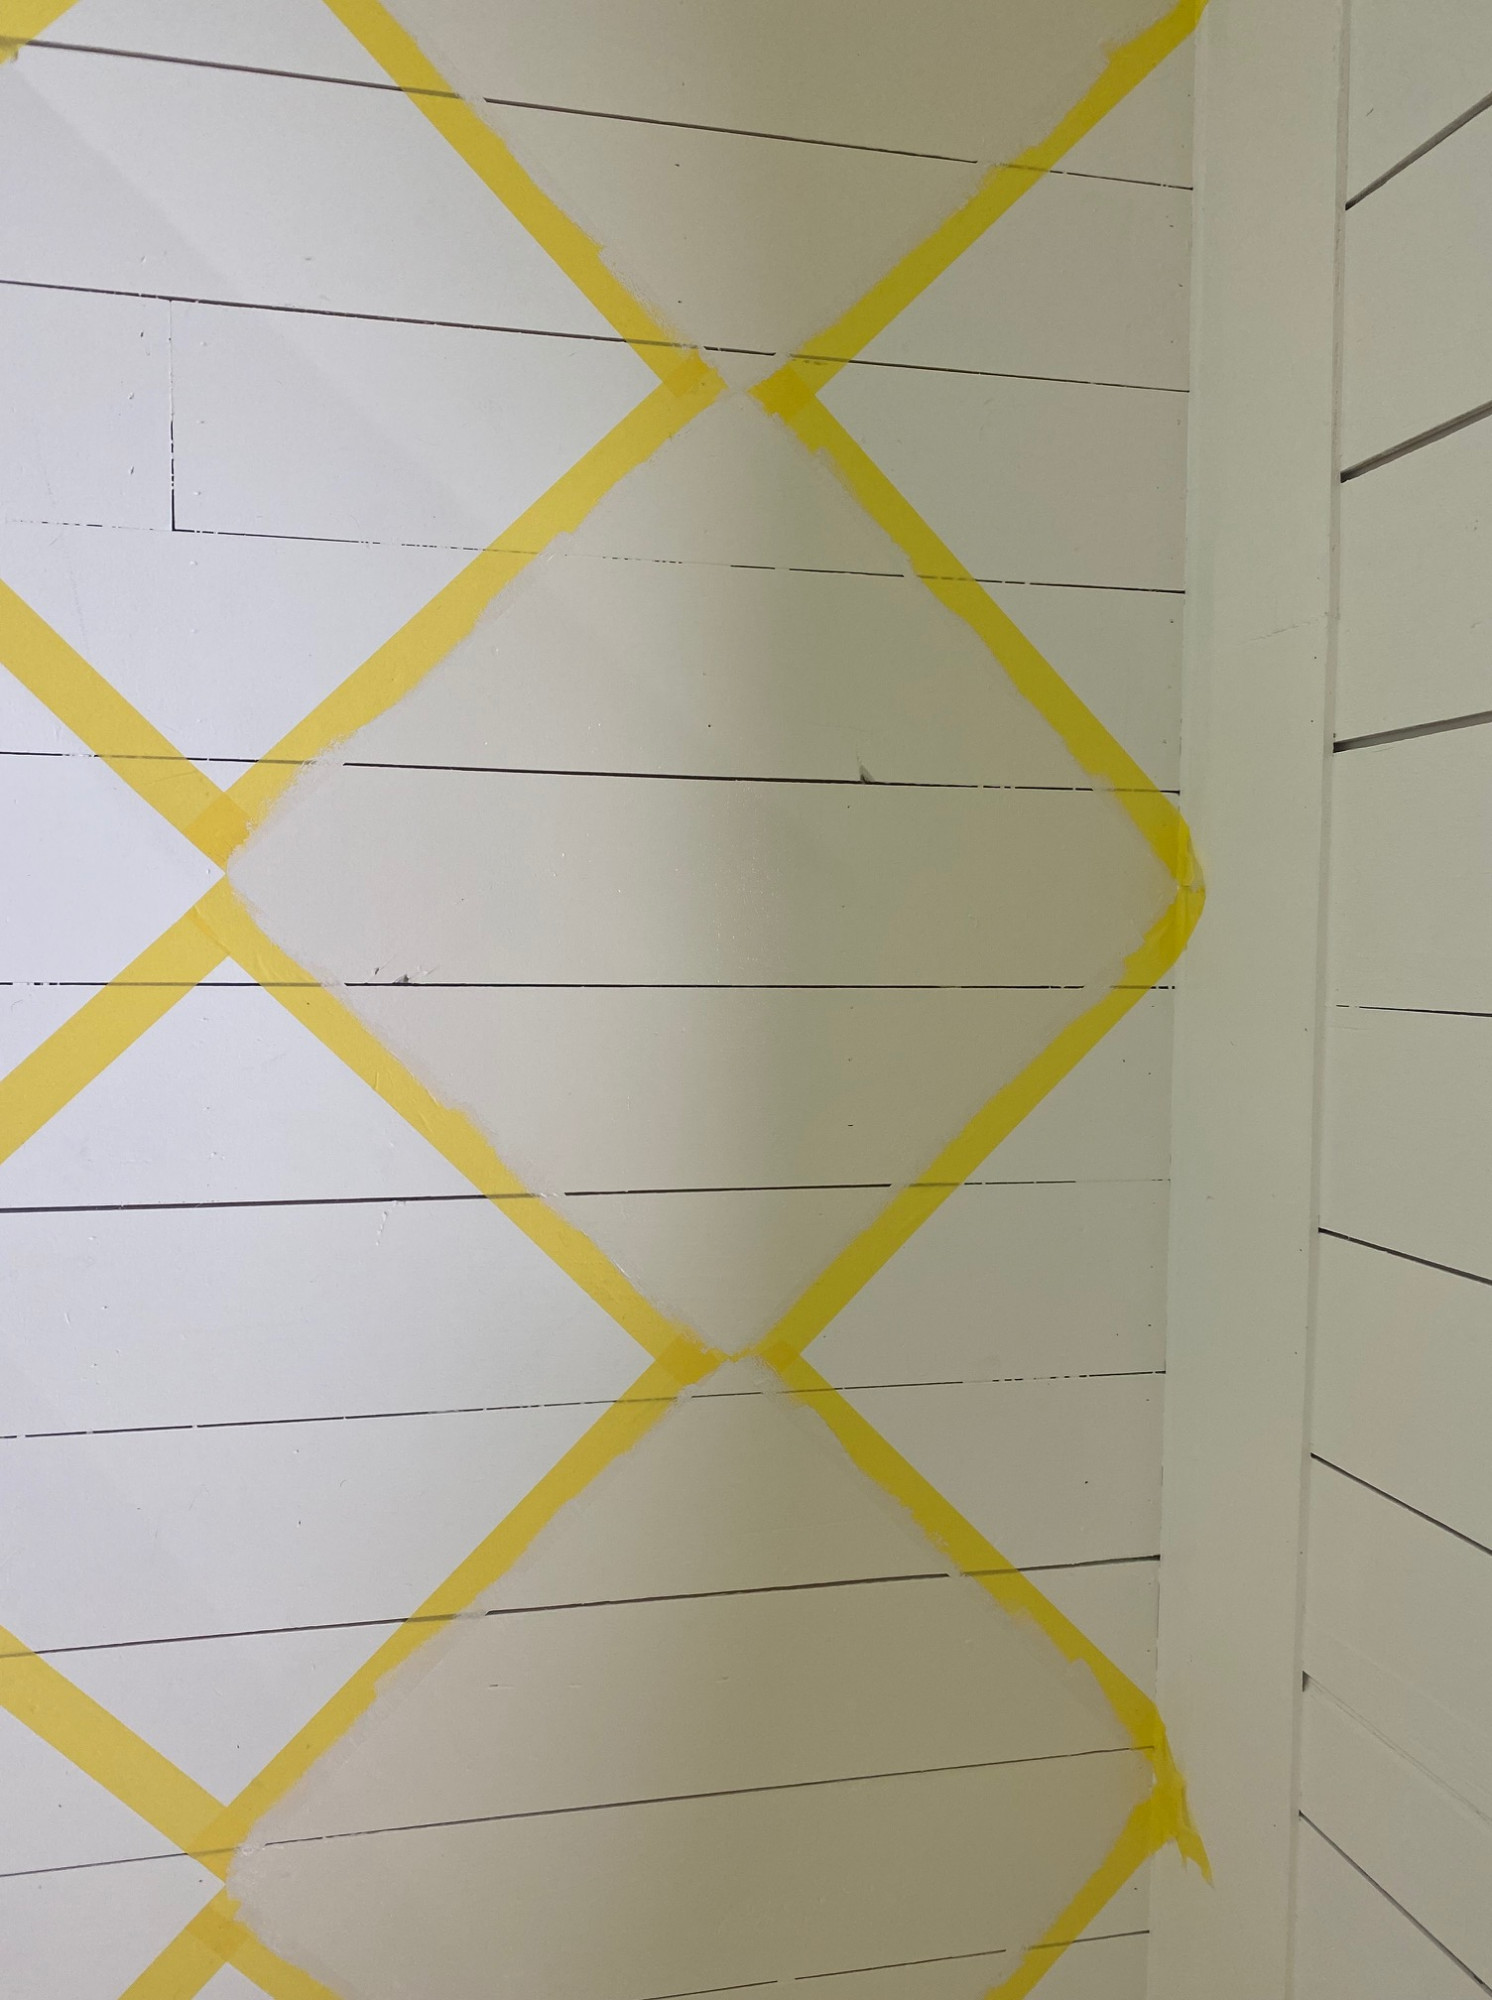
And here is how to get the diamonds to touch. After the first diamond was taped off, I placed the template so that it touched the square the tape outlined. This means that the template was on top of the bottom point of the first diamond I outlined. Because of this I had to use a razor to slice the painter’s tape and remove it from the new diamond. This requires a bit of skill but it’s easy after the initial run. Ideally, the razor is very sharp, so you don’t press down hard at all, which prevents cutting the wood floor itself.
This same pattern of 1) aligning the template with the laser guide so that it’s oriented correctly, 2) placing the template on top of the prior diamond outline so that the points touch, 3) cutting off the excess, and 4) taping a new outline repeats until you get near the walls. When you get close enough to the wall (or really any impediment) so that the template no longer fits you’ll have to use a straight end and a square edge to continue the pattern. The square edge should be placed so that it’s on top of the prior diamond’s outline just like with how you did so with the template. Next, tape along the outside of the edge to the wall, making a partial diamond. To finish, cut off any excess tape.
When the diamonds are all outlined give the floor an eyeball test to see if you notice any major peculiarities that can be fixed by adjusting the tape. This is much easier to do than repainting. Next, ensure all the tape is pressed firmly against the floor by firmly running your fingers down the sides. I can’t emphasize how annoying it is to pull tape and finding that some leaked under an unsealed edge. Also, and this is optional, I wrote a small ‘P’ for paint in each square I was painting. It helped me make sure I didn’t just make the dumbest of all mistakes by painting adjacent diamonds. Yes, it was overkill but after all the taping I was tired and craving a bacon, egg, and cheese sandwich.
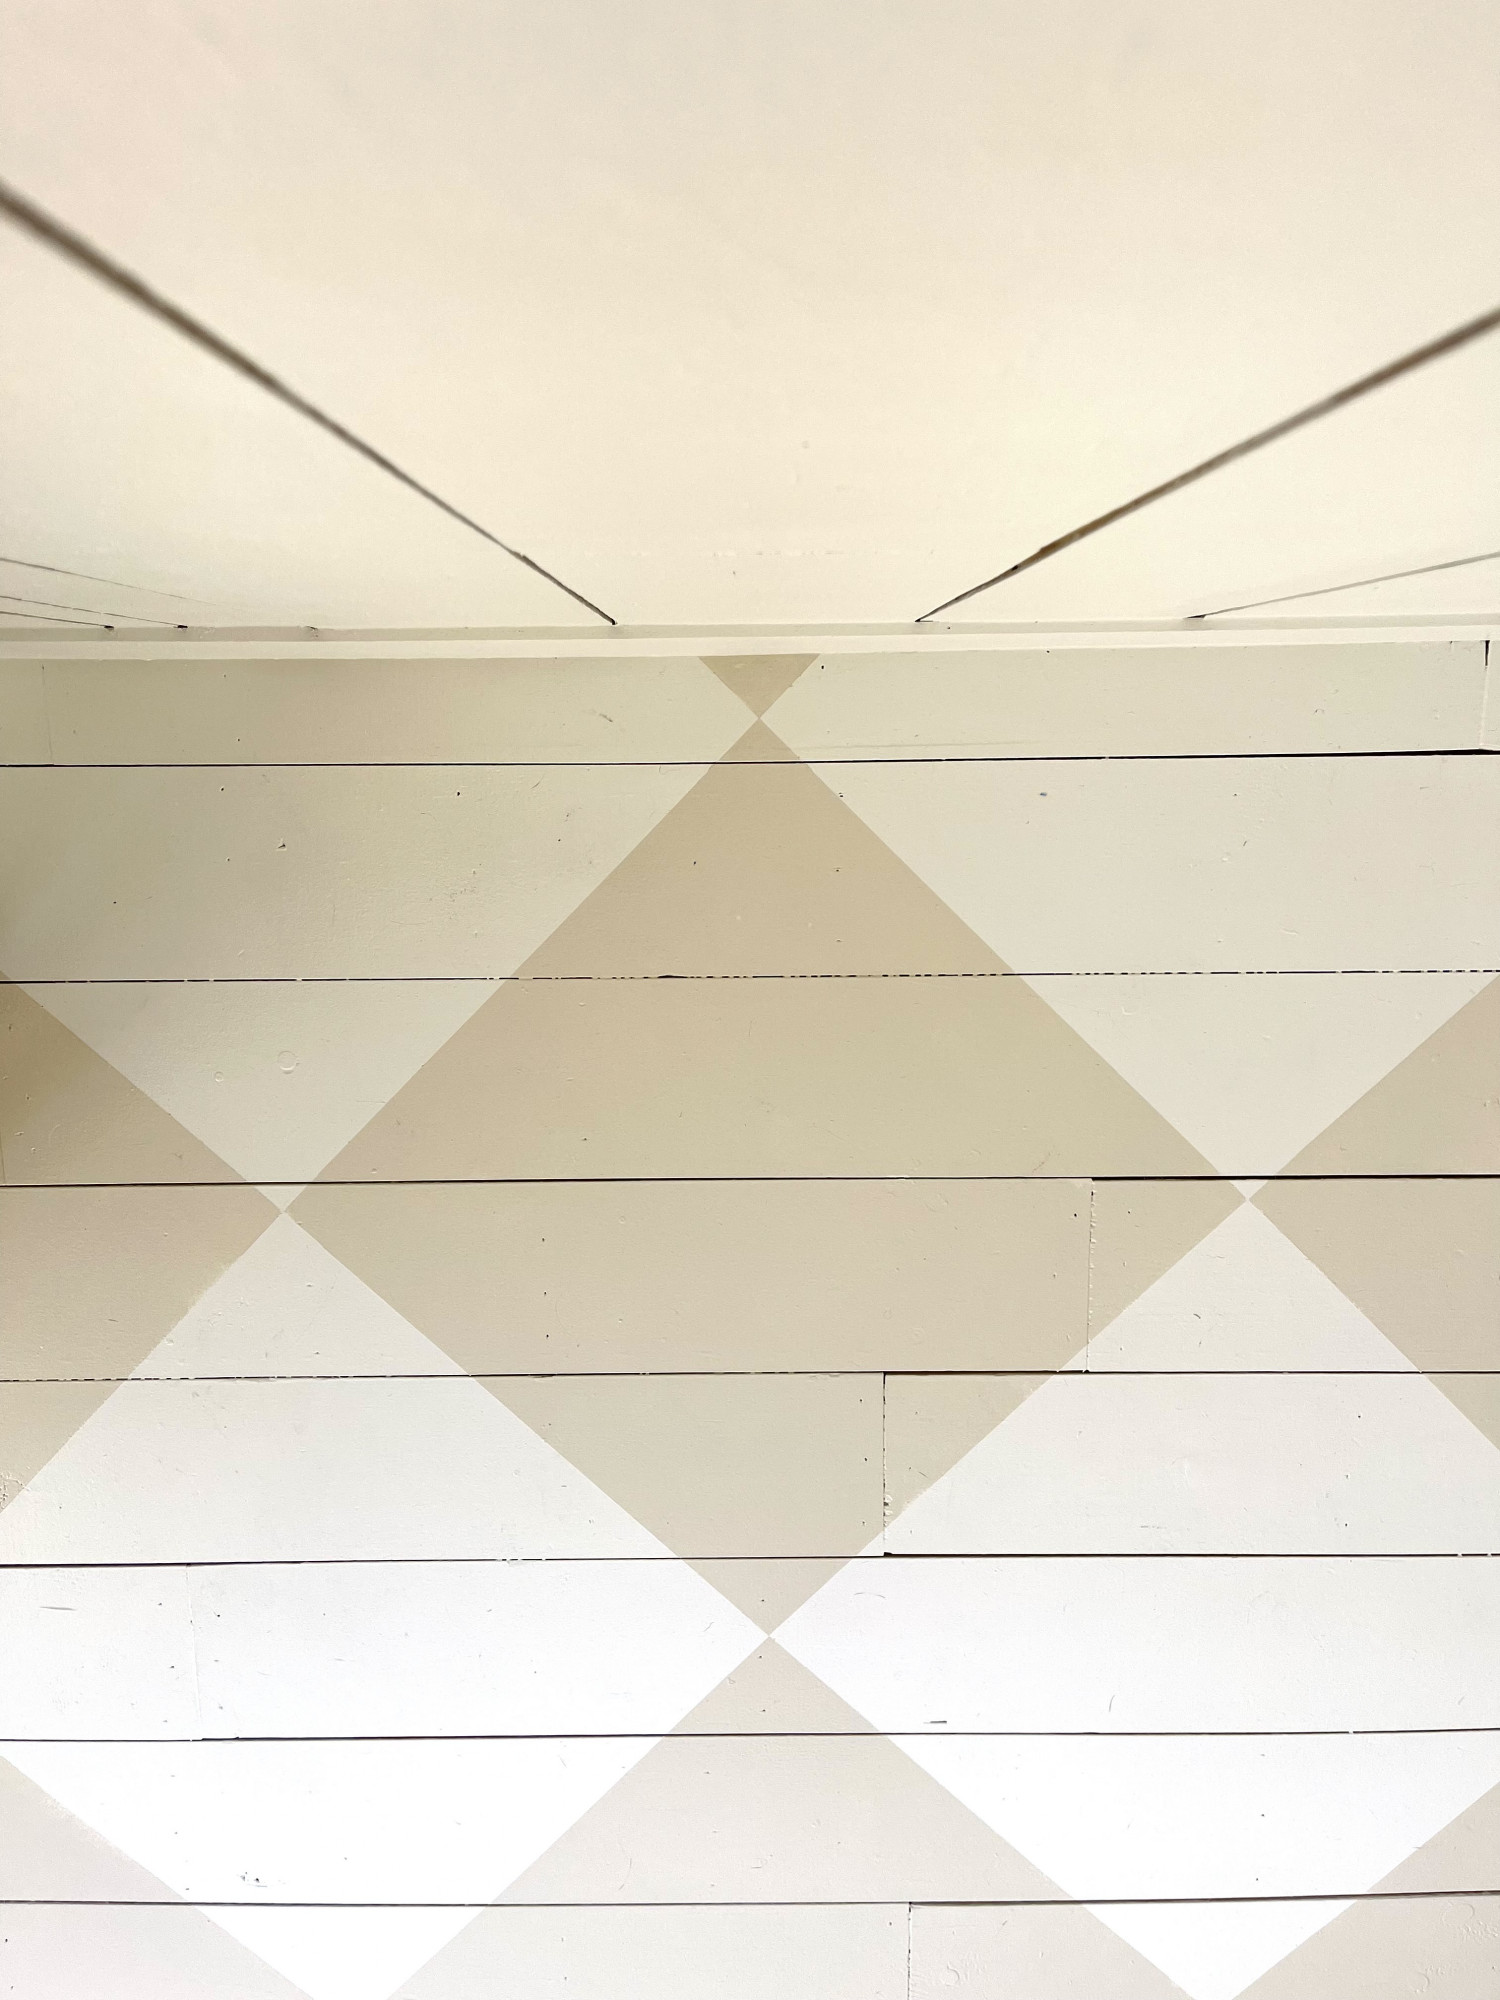
Same as with the taping, the painting process is tedious and requires patience. I used a super small artist brush to get the small areas near the wall. Also, the 3-inch-wide roller I used for the main section of the room only had a ½ inch nap (the hair on the roller that holds the paint). This is because I wanted to ensure that I couldn’t easily smear a paint glob onto part of the floor that wasn’t supposed to be painted. Additionally, make sure to overlap the tape when applying the paint so that it pushes the tape even more against the floor. Last tip – roll out the roller on the pan so that not too much paint is going on at once. You want to ensure the paint goes only on the diamonds you want painted. (Told you this was tedious)
Oh, and don’t paint yourself into a corner. Plan ahead to ensure you end the painting where you exit.
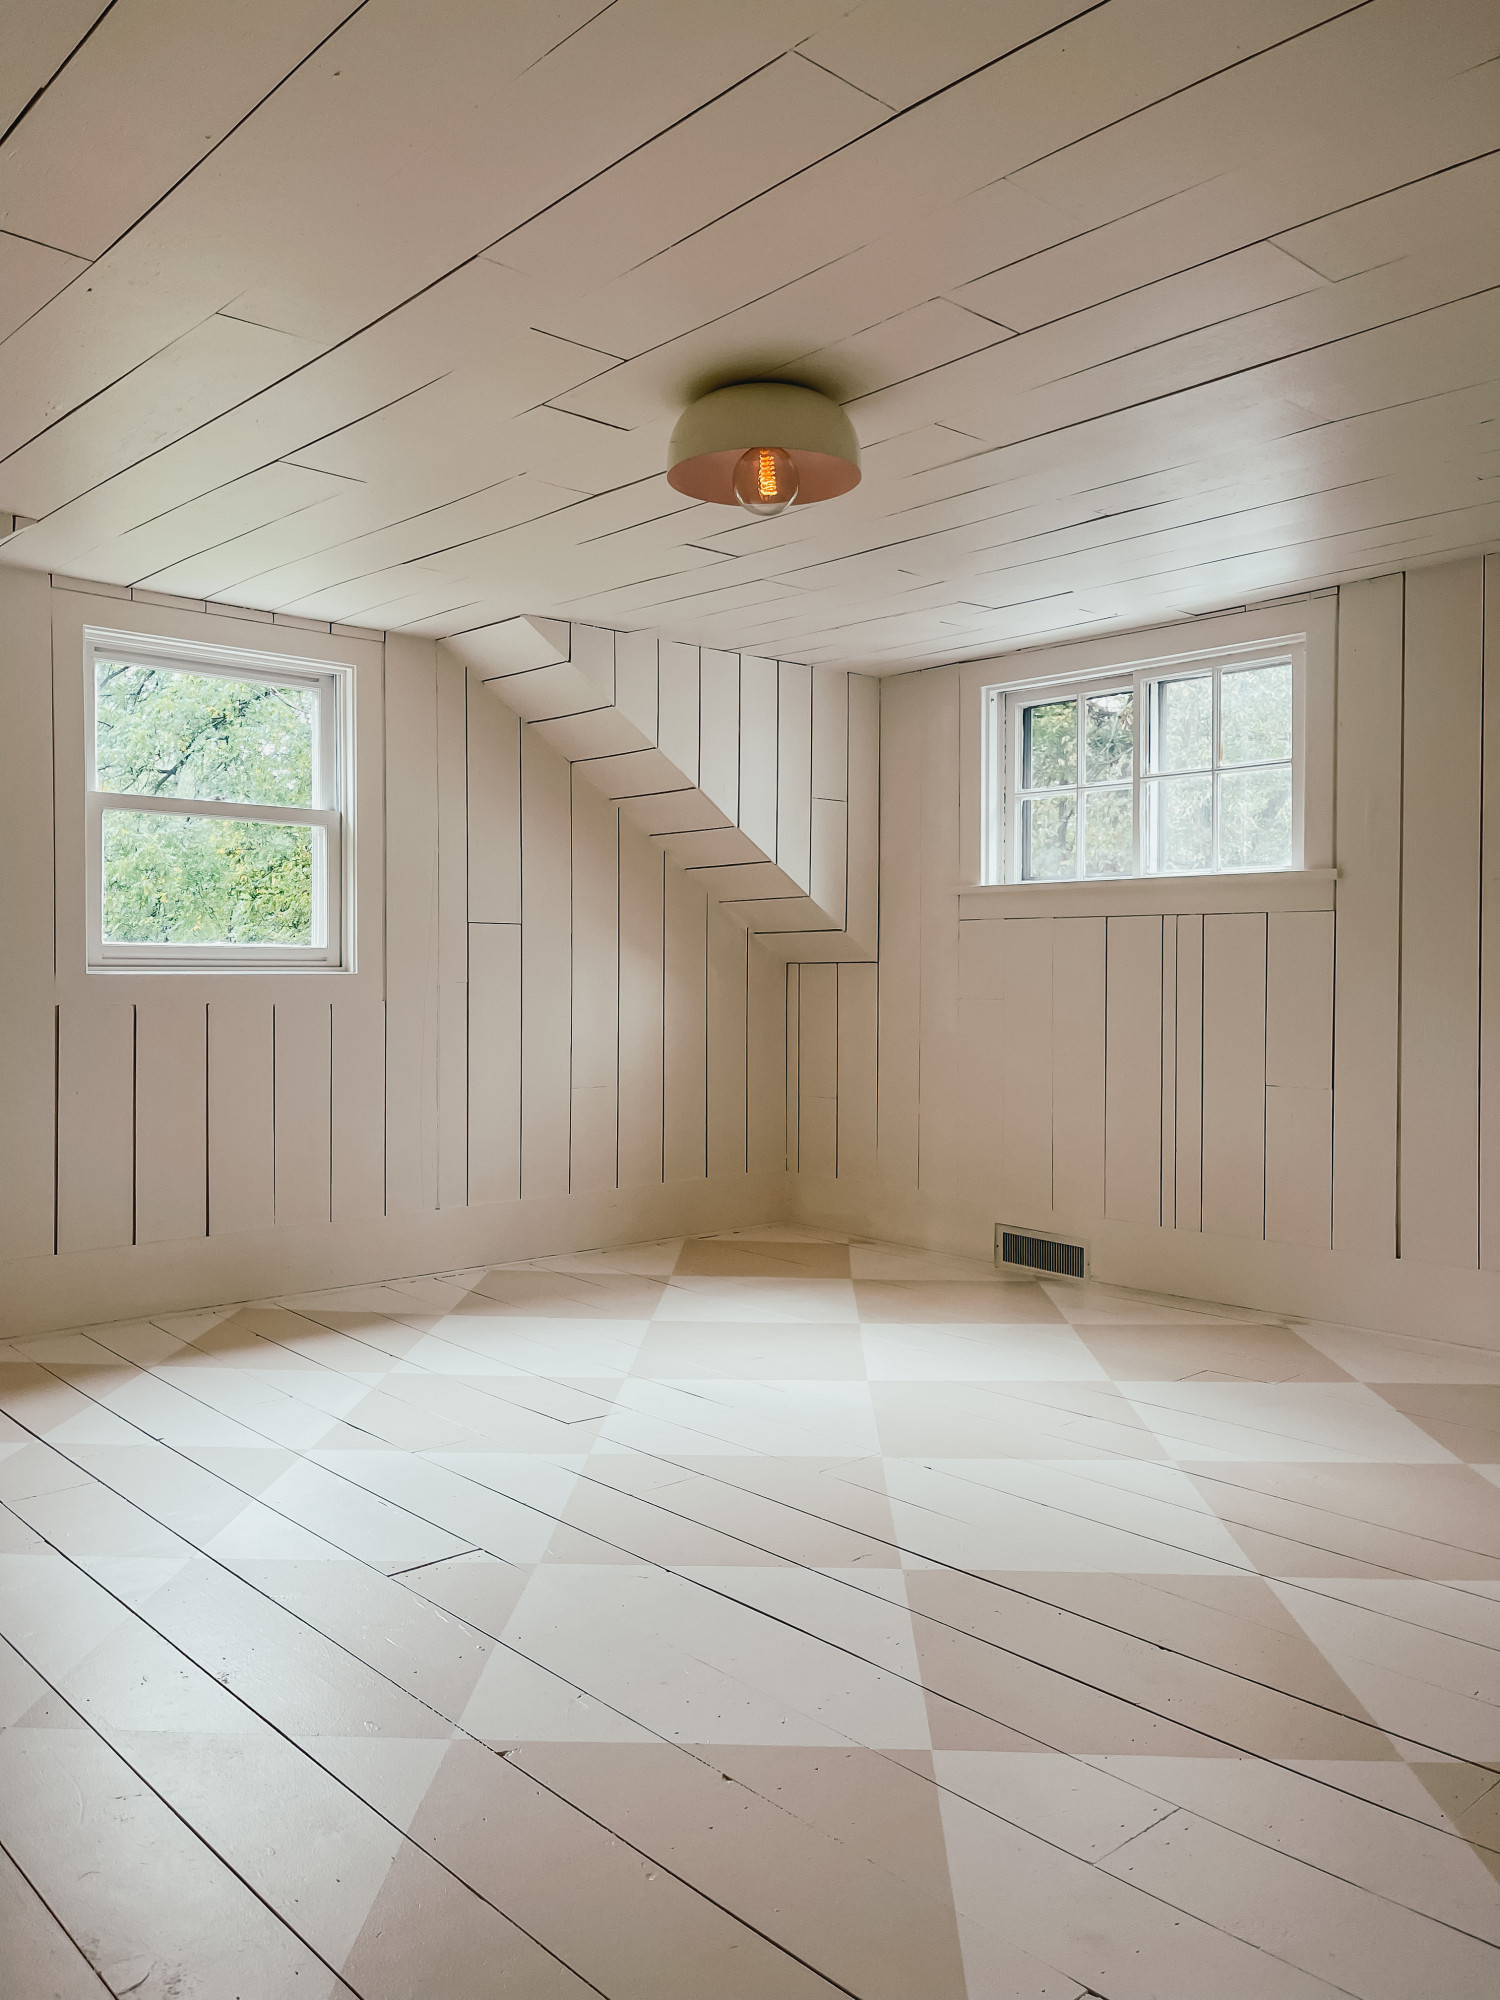
When you’re through and the paint has dried make sure to apply poly so that your work is preserved.
Colors used walls and light color on the floor Swiss coffee, dark diamonds are antique white. Both Benjamin Moore.
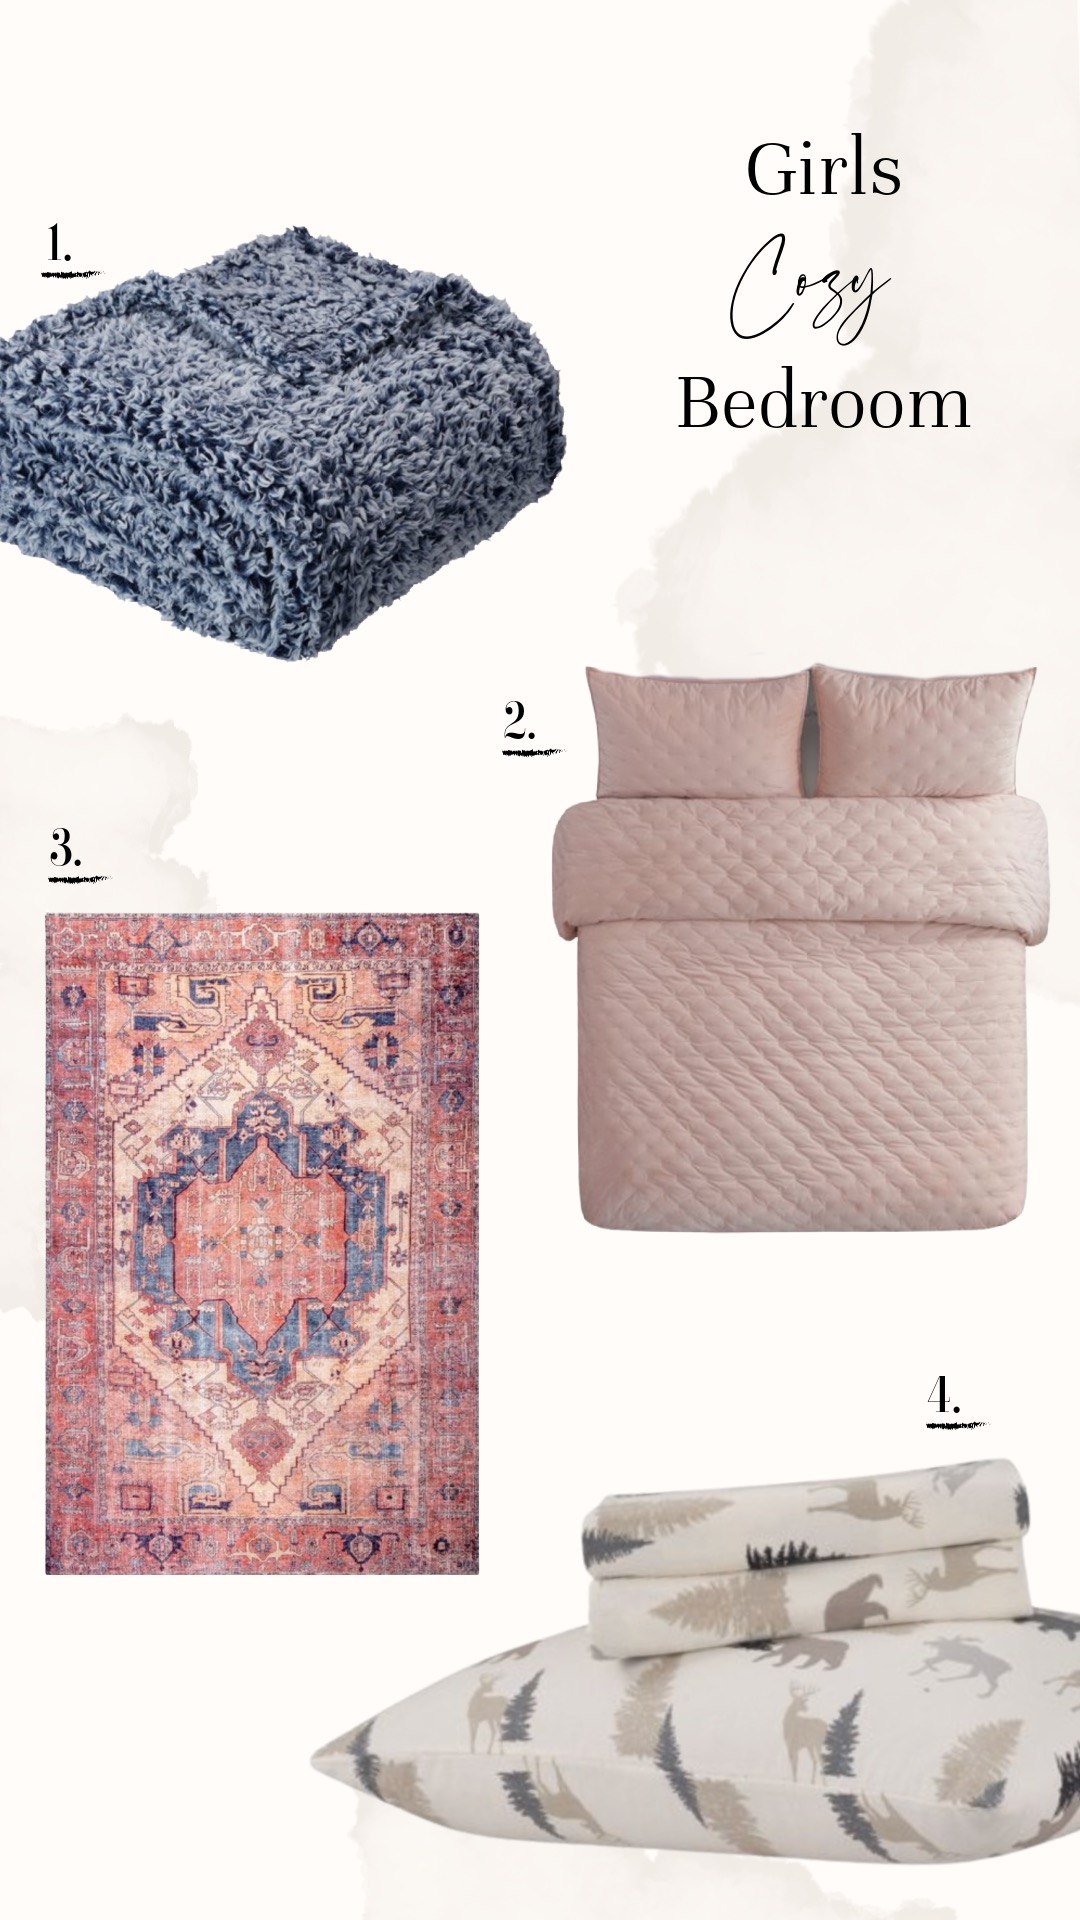
Here are the links to what we used to decorate!! (Collage Below)
-
Mainstays Extra Plush Lightweight Sherpa Throw Blanket, 50″ X 60″, Blue
-
Better Homes & Gardens Embroidered Velvet Quilt, Full/Queen, Blush
-
nuLOOM Transitional Leslie Area Rug
-
Mainstays Flannel Sheet Set, Grey Wilderness, Twin
And here are the tools we used 🙂
Hey! So, I know you were painting over your hallway floors that had been painted and sealed three years ago. Did you have to sand the poly off before you did your new coat?! That makes me want to not even consider doing this LOL
Hey Meg, Rob here. I don’t sand off the poly and have never had an issue. What I do is two coats of floor paint and then poly again. I did find that when I moved furniture on recently painted floors, that it scratched off where the legs dragged but if you can wait three days for the poly to fully harden before moving furniture back on then you’re completely good without sanding off the poly. In my case, I had to touch up the paint, let it dry, and then poly the spot. It was annoying but the scratched area disappeared completely. Good luck!
Great article – Thank you very much
Hi Stephen, thank you for your comment. Hope you found the post helpful.
We actually used marine aka boat paint by Rustoleum in glossy white and after 8 years no chips, still glossy but knots are bleeding through! Love painted floors!
I painted my floors high gloss white roughly a year ago. The DIY blog I followed did not recommend poly as finishing coat and I’ve noticed surface scratches in the paint from my dog’s nails. Would poly help w/ this?
Absolutely it would! We applied two layers and the floors have kept up perfectly.