
Hey world!
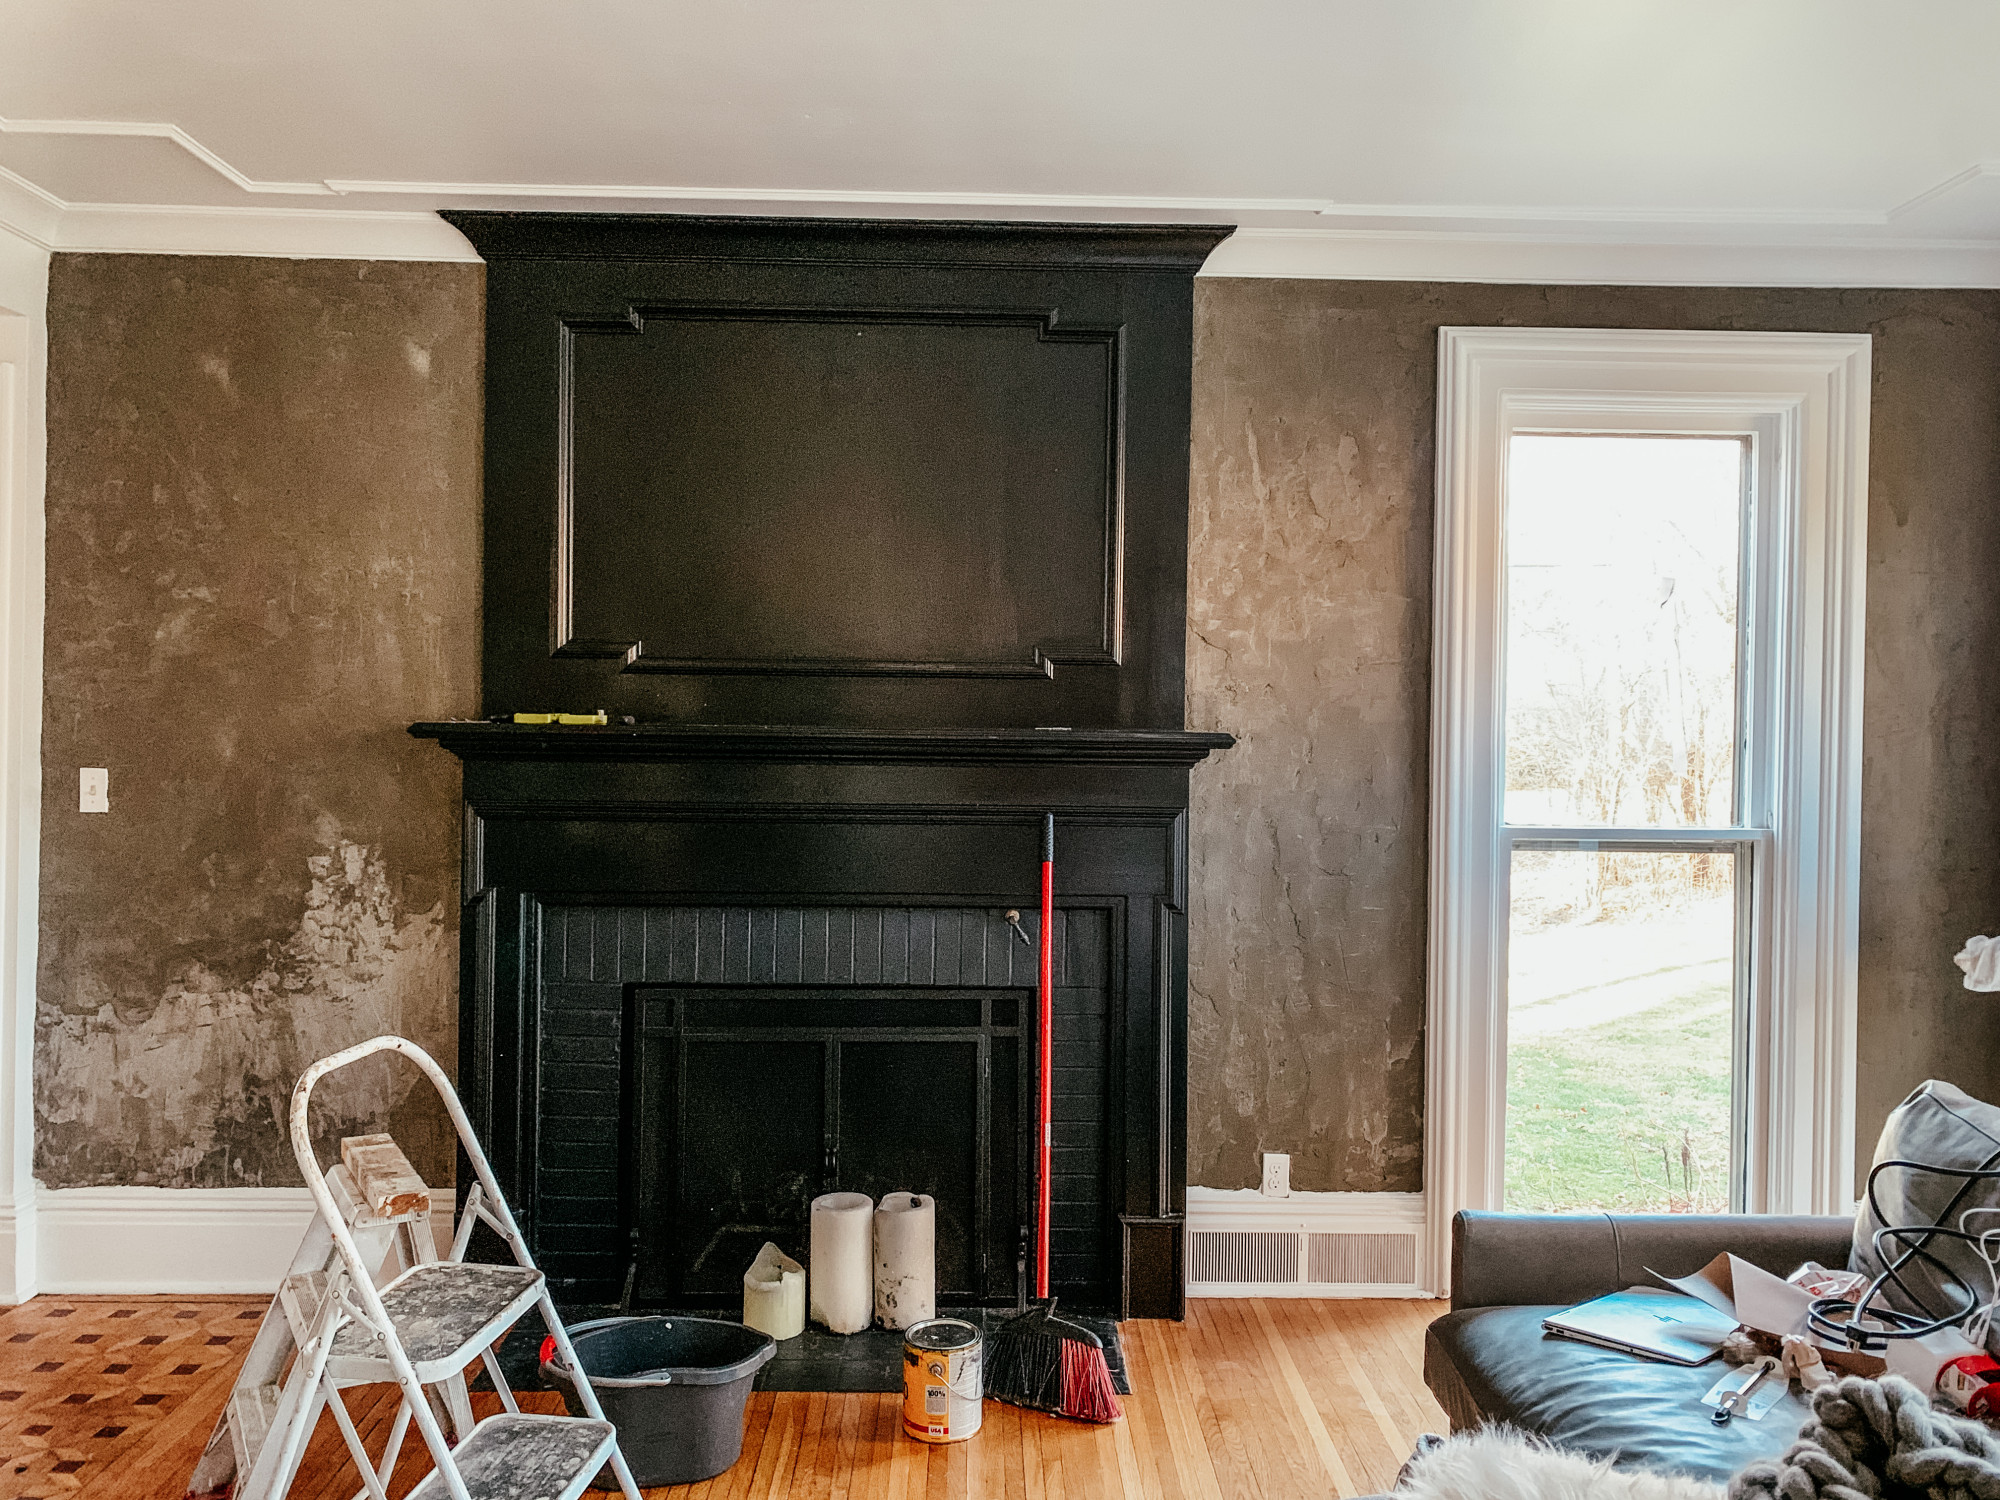
Rob here. SQ asked me to write up a post on how to apply concrete on a wall. We used this in two spaces. One in our living room, and the other on our Tuff Shed fireplace. Hope y’all find this helpful. (And don’t call me out on using a noun as a verb.)
Firstly, I’ll start by writing that concrete is messy. It will be difficult to keep it from getting everywhere. You’ll want lots of protective painter’s paper or sacrificial blankets (which must be very thin if you’re concreting all the way down to the floor. Both options absolutely must be taped down because inevitably a big ugly glob of quickly hardening concrete will fall on the unprotected area. Additionally if it’s possible, set up a mixing station outside. You’ll want a 10 X 10-foot area that has the ground covered or a place where it’s acceptable that concrete will fall on. Ideally this’ll be outside because concrete dust will be flying around. Have your 5-gallon bucket ready, a second bucket full of water (or a hose) ready so that you can immediately wash off your tools. Seriously, the concrete hardens fast and it’ll quickly ruin your tools if it’s not washed off immediately.
Next, after you’ve properly secured your floors and more importantly, resigned yourself to the fact your efforts will ultimately fail, you’ll want to use painters tape to edge. I’m jumping ahead here but it’s to emphasize something very important.
After you’ve finished concreting the walls, pull the tape while your concrete is wet.
I learned this the hard way. The concrete will harden in 30 minutes after you add your water (this includes the mixing time, so you really have 20 minutes to apply to the walls). It really sucks pulling easily tear-able tape from behind what is essentially rock.
So back to the beginning once the area is taped and prepped as much as feasible it’s time to mix. I used Quikrete20 lb. Polymer Modified Structural Concrete Repair. It shows right on the label that it can be applied vertically. This is possible because there is a polymer mixed into the concrete, so yes there is oil included so don’t eat it. Before getting this version of Quikrete I tried a bag of “normal” concrete and bought to polymer mix separately because I was trying to save money. That was a waste. It did not stick to the wall at all. My advice is to simply pay the few bucks extra to make sure it works.
A few more notes before you begin, if you bought the second bucket, you’ll want to keep it half full of water. You’ll keep your bucket scoop and tape knife (or finishing trowel instead of the tape knife, which many people prefer because the curved edges prevent creases in the concrete) submerged in here while not using them. Also, keep a wet rag in here. This will be helpful when you find that a blob of concrete defied physics and ended up below your protective sheets. If possible, wipe it away before it hardens. If not though do not be afraid. With enough water and patience, the dried blob will react to the wetness and dissolve away. Note!!!!!! Do not get impatient and simply kick off the blob. It’ll rip the paint off whatever it landed on or worse.
Mixing concrete is freaking hard work. For the fireplace in the Tuff Shed I did this by hand. It sucked. Don’t do it if you aren’t a professional massage therapist with gorilla like grip strength. My first attempt at buying a mixer failed because it didn’t fit my power drill. This mixer is designed for paint but it worked just fine with my smaller batches of concrete. Using a mixer left me with a better consistency and much less waste since the last bit on the bottom wasn’t missed. It probably ended up paying for itself. One thing to note though is that my power drill’s battery lasted roughly ten batches so if you have a second battery pack, charge that while using the other one.
The process of mixing is straightforward. It’s simply water mixed with the sand/gravel contents included in the bucket. I recommend pouring half the concrete mix into the larger bucket. Next add water according to the instructions. Use the power drill to mix it all together. It’ll take roughly 3-5 minutes to get the perfect creamy peanut butter consistency. If it’s crumbly add more water. If it’s too liquid, add more concrete. It may seem tough to achieve the right outcome but don’t worry. After one or two rounds of mixing you’ll be an expert. I should also emphasize that this part is messy. Do it outside if possible. Once mixed know that at this point the clock is ticking. You’ll have roughly 20-30 minutes to scrape it onto the wall. Time to get to work.
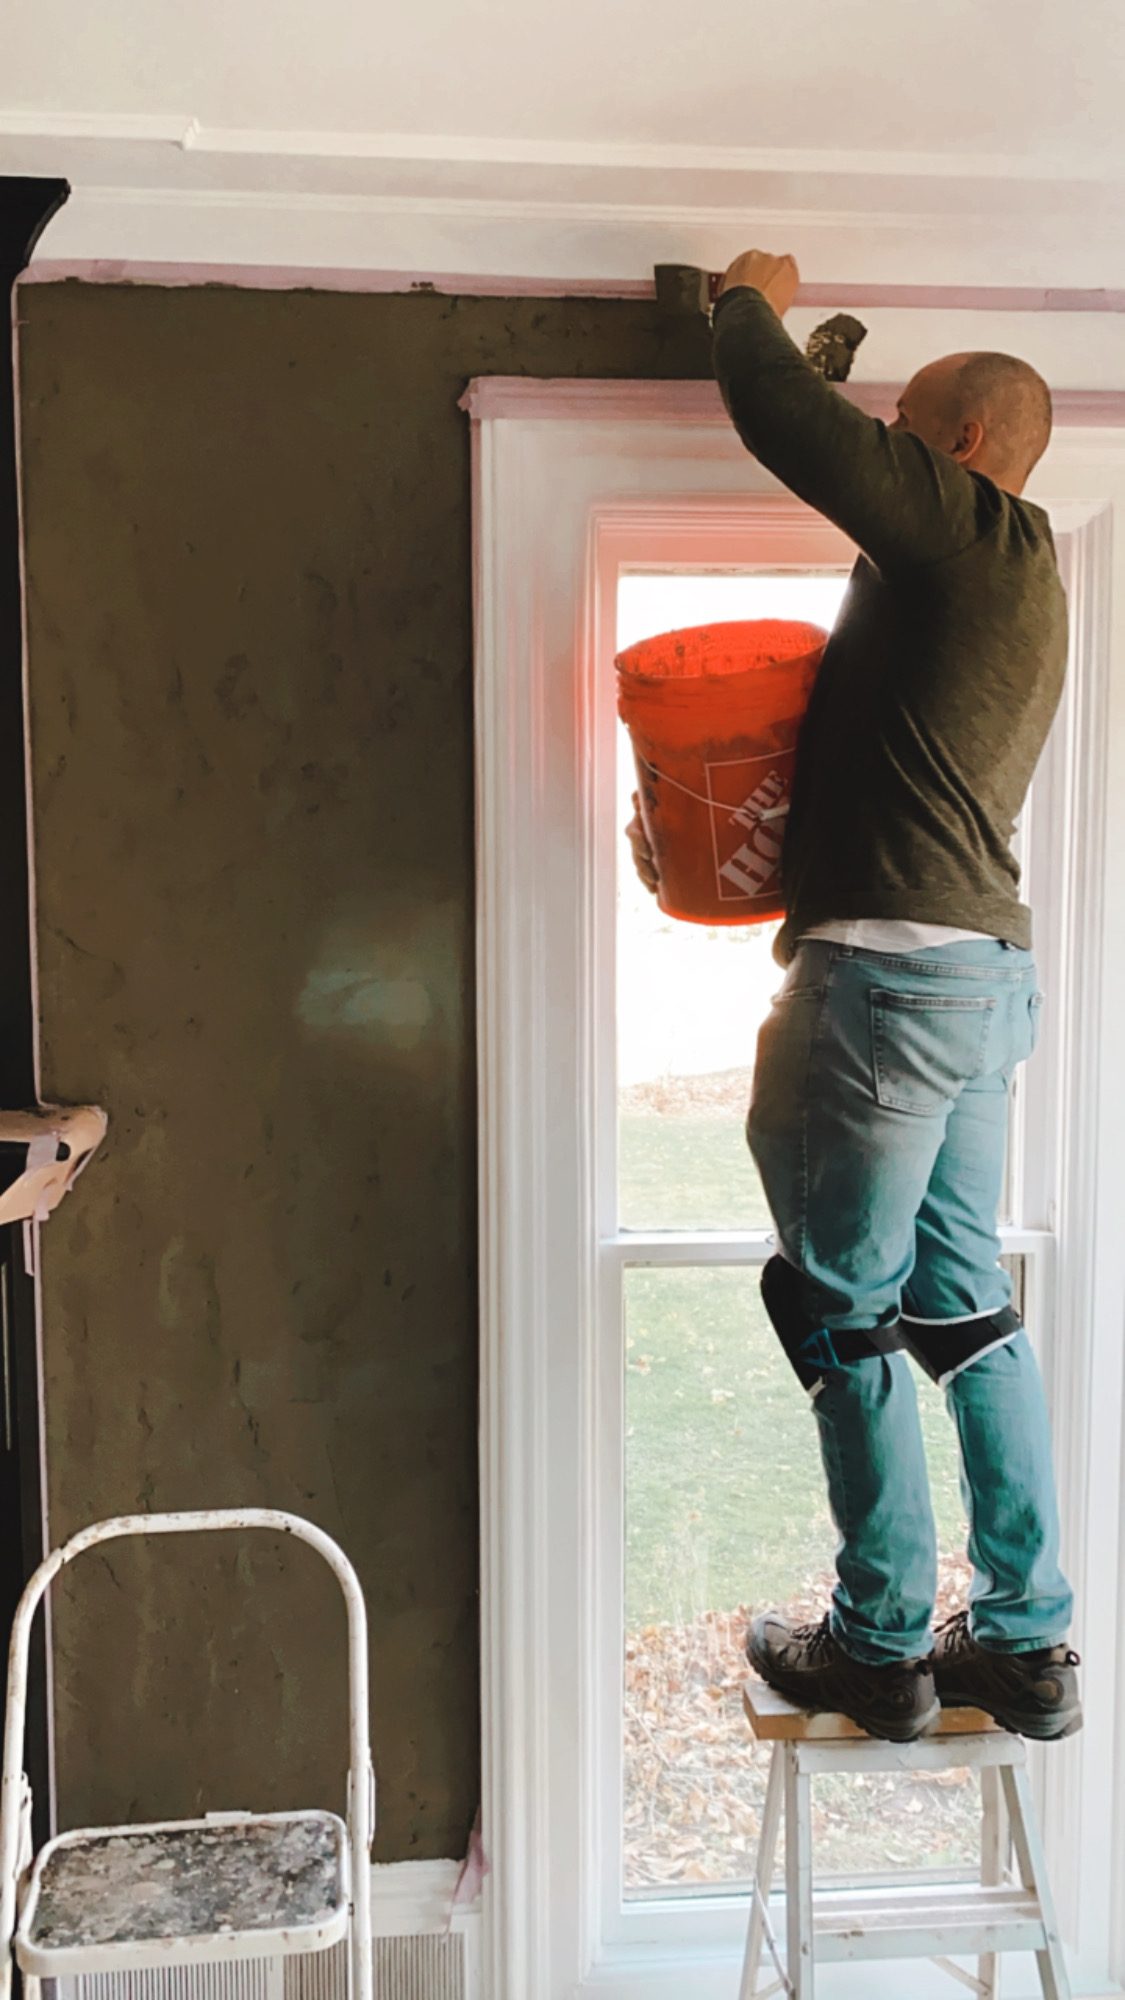
So now that the floors are protected, edges taped, tools ready, and concrete is mixed it is time to put it on the walls. To do this use the bucket scoop. The angle will face away from you as you pick up portions of the wet cement mix. (Take a moment to appreciate that the curve of the tool perfectly matches to curve of the inside of the bucket. I can’t be the only dork to be awed by such things.) What I thought when I first used this tool was that it looked as if I was using it backward. But you’ll want the cement on the downward curve so that you can smear it onto the wall. You’ll want to do your best with this tool to smooth out the layer of concrete you applied, but it won’t be perfect. Don’t worry though because that is what the tape knife and/or finish trowel are for.
I worked from the ground up. First, I would glob a patch of concrete onto the wall. Most of it will stick if you’re lucky. Then I’d used the bucket scoop to spread it around till there was about ¼ inch thick layer of concrete. I’d fill in roughly a 3X3 foot section and then use the tape knife to smooth it all out. Keep the tape knife wet though. “The wetter the tool to smoother the finish”, said she. If the trowel gets too dry, you’ll find that it doesn’t glide over the concrete. You’ll end up with staccato ridges as it “bounces” over the concrete. The application and finishing motion should be like Daniel’s training in Karate Kid: “Show me, paint the fence”. Note, if you mix your cultural references and “wax on, wax off” the wall will explode.
Once you start it’s a good idea to keep applying the concrete until the end or at least to wherever there is a natural break in the work area. If you stop for an hour and begin again you be able to see the two sections. Eventually after a month or so they’ll mostly blend together but it might annoy you until it does. The two sections can be sanded at the seam where they meet and that’ll hide the distinction too.
Once a section is complete don’t forget to pull the tape!!
The last bit of work to do is the touchups. Use a small putty knife to fill in any miss spots and finish off the edging. This one works well.
Optional: in the Tuff Shed I sanded the fireplace but not the living room. I did this because when I concreted the fireplace I didn’t use enough water with the tape knife and hand-mixed, so the concrete was really grainy. The whole thing didn’t have a smooth finish. By the time I did the living room I had learned that I needed to use a lot of water while smoothing and it looked a lot better the first round. Also, sanding means a ton of dust. I did not want to deal with all that inside our house.
Mistakes I made:
- Concrete literally sucks the moisture from your skin. You can either wear gloves or put lotion on every hour or so to prevent your skin from being painfully dry.
- When I did the fireplace I accidentally touched the concrete with my lotion-y hands and my big paw print was visible until I sanded it off. Don’t touch the concrete with any oils or lotions.
Tricks I used that worked: Rather than pulling the sockets and light switches out to account for the quarter-inch of concrete I just tapered it down to the thickness of the face plates. This looked pretty good and I can’t even see the taper now even when I look directly at the sockets.
- Quikrete20 lb. Polymer Modified Structural Concrete Repair
- Buckets (X2)
- Easy Mask 2.9 ft. x 140 ft. Builder’s Paper
- ScotchBlue 1.88 in. x 60 yds. Original Multi-Surface Painter’s Tape
- Bucket Scoop
- 12 in. x 4 in. Finishing Trowel
- Tape Knife
- Putty Knife
- Mixer
- Power Drill
- Pro Cleaning Disposable Nitrile Gloves 1 Size (100-Count)

Hi, good tutorial, difficult job, just wondering why you chose to concrete a wall, I know there has to be an excellent reason to prep the surfaces, carry the weight of all those supplies, mix it all up properly, get it up on the wall in a short time period, etc…Quite the challenge!
Hi there! Susan is always dreaming up new and creative ideas. Concrete may not be typical, but with her vision and Rob’s love for DIY they made a dream come true! It sure is a beauty. Glad you liked the tutorial.
Did you apply this over a textured painted wall? Did you have to prep the surface at all? Also have you hung anything on the wall since? Can you put a nail in the wall or does this cement chip off? I would like to do this on one wall in our master bedroom!!!
Hey Cassie, Rob here. We did not prep the wall. We used a concrete mix with polymers in it so it stuck. Home Depot has it and we linked on the blog.
As far as the nail, yes the concrete does make it more difficult once hardened. I handled this by converting around screws that I knew we were going to keep in place (the ones we used to hang the mirror). For the picture frame and blanket rack I had to drill through the concrete and add in anchors before adding in a screw. It is harder with concrete to hang stuff but does look good. Oh and you shouldn’t use a nail. Drill and concrete anchors only.